my e-mailaddress


dinsdag 16 februari 2021

Bijna geen vingerafdruk meer over… / Almost no fingerprint left…

Snel even een keldervloer maken, ja, dat dacht ik echt hoor 😇!
Gewoon van passe-partout karton tegels snijden, vast lijmen en dan een beetje bewerken, maar…..dàt werd helemaal niet zoals ik het wilde hebben. Dus wat toen..?
 
Quickly making a basement floor, yes, that what I seriously thought 😇!
Just cutting tiles of passe-partout cardboard, glue them down and than a bit of editing, but….THAT was not as I wanted it to be. So, what next to do…?

Dit is de échte kleur van de vloer / This is the Real color of the floor

De vloer was klaar, maar het snijden van de tegels moest nog gedaan worden, dus daar ben ik mee begonnen. Na het snijden heb ik eerst van elke tegel de vier zijkanten bijgeschilderd met donkerbruine acrylverf, zodat na het voegen de witte zijkanten niet meer te zien zijn.

The floor were ready, but the cutting of the tiles had to be done yet, so that’s where I started with. After the cutting I firstly painted with dark brown acrylic paint all the four sides of every single tile, so that after the grouting the white sides would shown anymore.

Maar terwijl ik elk tegeltje opzij legde, na het beschilderen van de zijkanten, vond ik de tegels eigenlijk veel te nieuw lijken om in een boerderij (van toentertijd al 50 jaar oud) te liggen. Dus na wat nadenken besloot ik de tegeltjes een voor een te gaan bewerken met crème was voor krijtverf. Daarna zagen ze er nòg mooier uit, maar mijn bedoeling was dat ze d.m.v. de crème was beter beschermd waren tegen eventuele wateroplossingen die ik nog voor de afwerking zou willen (of kunnen) gebruiken.
 
But while I was putting aside each tile, after painting all of the four sides, I thought the tiles were actually looking far too new to lie in a farmhouse (of 50 years old at that time). So after some thinking I decided to edit the tiles one by one with cream wax, for finishing chalk paint. But after than they looked even more beautiful but my intention was that they were the cream wax better protected against any watery solutions that I would like (or could) use for the finishing.


Om de glans wat te verminderen, ben ik heel voorzichtig de papieren tegeltjes gaan schuren met ultra fijn schuurpapier. Dit ging verbazingwekkend goed, er kwamen geen stukjes verf los en ze werden mooi mat.
Helaas zie je op bovenstaande foto ernstig ‘beschadigde’ (bekraste) tegeltjes, maar dat komt door het scherpe daglicht veroorzaakt door de sneeuw buiten. In het echt zijn ze mooi en dof geschuurd, elk tegeltje heeft een eigen schuurpatroontje. 

To reduce the shine, I very carefully sanded the paper tiles, using ultra-fine sandpaper. This went amazingly well, no pieces of paint came off and they became beautifully matte.
Unfortunately, the photo above shows seriously "damaged" (scratched) tiles, but that is due to the very bright daylight, caused by the snow outside. In reality they are wonderfully sanded and matte, each tile has its own pattern after sanding.

Het gevolg was dat alle crème was er weer van af was geschuurd en om ze te beschermen tegen water moest ik weer opnieuw beginnen met ze stuk voor stuk in de was te zetten. Maat tegeltjes: 20 x 20 mm.

The result was that the whole layer of cream wax was sanded away and to protect them against water, I could begin all over again with putting cream wax on them, one for one. Size of the tiles: 20 x 20 mm.


Hierna ben ik de tegeltjes eindelijk gaan vast lijmen, maar niet nadat ik op internet had gekeken om te zien hoe ze traditioneel werden gelegd in boerderijen. Dat was dus op een verspringende manier.

After this I finally started gluing the tiles, but not after looking on the internet to see how they were traditionally laid in old farmhouses. So, I found out that this had to be done on a staggered(?) way.

Oké, tot zo ver ging het redelijk goed, maar dan….
Ik kwam aan bij het moment om te gaan voegen, maar in het echt werden deze tegels eigenlijk niet gevoegd, nee, ze werden in een bed van waterdichte specie gelegd. 
Goed, hoe moest ik dat in mini gaan doen..?
Na lang nadenken besloot ik toch te gaan voor het medium dat ik ook in de keuken heb gebruikt. Dit is een medium bestaand uit een acrylaatharsdipersie gemengd met zeer fijn gemalen puimsteen, zie foto. Normaliter is dat medium bedoeld voor een korrelige ondergrond te creëren om daarna met zachte pastelkrijt een tekening te maken. Na het voegen van de echte miniatuur tegels in de mini keuken (gekocht bij Romney Miniatures, website: https://www.romneymin.co.uk/ ), had ik hier goede ervaring mee, het werkte prima.
 
Okay, so far it went pretty well, but then….
I came at the point of starting to grout, but in reality these tiles were not actually grouted, no, they were traditionally placed in a bed of waterproof mortar. 
Well, how was I supposed to do that in mini ..?
After a lot of thinking, I decided to go for the medium that I also used in the mini kitchen. This is a medium consisting of an acrylic resin dipersion mixed with finely ground pumice, see photo. Normally, this medium is intended to create a grainy surface and then make a drawing with soft pastels. After having grouted the real miniature tiles in the mini kitchen (bought from Romney Miniatures, website: https://www.romneymin.co.uk/ ), I had good experience with this stuff, it worked fine.

De kelder heeft een apart gedeelte waarin later de keldertrap komt te staan, dus ik dacht voordat ik iets verkeerds doe, dan begin ik daar. Oh jee, wat een prima keuze!! Na het voegen van een paar tegeltjes zag ik een paar tegeltjes onder het 'voeglaag' verdwijnen en het was niet mogelijk om het restant er vanaf te vegen (het medium is sneldrogend). Het papier van de tegels nam teveel van het voegsel op en het bleef plakken waar het maar op kwam. Ik dacht: geen probleem, ik kan het er daarna weer van af schuren…..maar dat was ook niet mogelijk 😱.
 
The basement has a seperate section wherein later will go the stairs, so I thought before doing something wrong, let’s start in there. Oh my, what an excellent choice!! After grouting a few tiles I saw the tiles disappearing under the layer of 'grout' and I was not able to wipe away the residu (the medium is quick drying). The paper of the tiles took too much of the puimice and got stuck there where it was. I thought: no problem, I’ll sand it away afterwards….but that wasn’t possible either 😱.

Dus na een nacht goed laten drogen, heb ik de stoute schoenen aangetrokken en geprobeerd het teveel er af te schuren, maar dat ging echt niet. Ja, het geheel werd akelig mooi glad en zacht, maar er af ging het spul totaal niet. Wat nu?
 
So after letting it dry well overnight, I took the plunge and tried to sand off the excess, but that really didn't work. Yes, the whole surface became awfully smooth and soft, but the stuff didn't go off at all. What to do now?


Nou ja, nu was de vloer toch al verknoeid (dacht ik) en ik ben weer opnieuw begonnen, met beduidend wat minder voegsel, in de hoek ernaast. Maar ik had mijn lesje geleerd, dus veegde ik na elke voeg van elk tegeltje het overtollige weg met mijn vingers. Maar toen gebeurde er ineens iets. Misschien kennen jullie dat? Met één vinger begin je te werken, om er telkens een schone vinger voor in de plaats te gebruiken, totdat je natuurlijk zonder schone vingers zit ;). Zo was ik ook bezig en aangezien ik puur rechtshandig ben, kwam mijn linkerhand eraan te pas. Dus voegen, vegen en toen ging het tempo rap omhoog, waardoor het voegsel minder vat kreeg op de behandelde tegel en alles er ineens mooier uitzag. Kortom: ik was veel te precies bezig geweest en moest véél vlugger werken 😁.
 
Well, now the floor was now already messed up (I thought) and I started again, this time with significantly less grout, in the corner next to the first one. But I had learned my lesson, so after each joint of each tile, I brushed the excess away with my fingers. But then suddenly something happened. Maybe you are familiar with this? You start wiping with one finger, using a clean finger in its place each time, until you are of course without clean fingers ;). That's how I was doing and since I am purely right-handed, my left hand was involved. So grouting, sweeping and then the tempo went up rapidly, so that the 'grout' had less grip on the treated paper tile and everything suddenly looked more beautiful. In short: I had been working way too precisely and I had to work much faster 😁.


De rest van de tegelvloer ging vlot en zag er goed uit, het was naar mijn zin, maar dat stukje onder de keldertrap dan…? Daar ben ik begonnen met het lospeuteren van die ‘voeg’- laag om te kijken of ik het eraf zou kunnen halen. Nee, natuurlijk niet en tot overmaat van ramp scheurde het verflaagje er ook nog van af. Hierop heb ik besloten om met wat verdunde verf de beschadigde laag weer te schilderen en daarna nog iets voegsel er overheen gedaan. Het resultaat: een beschadigde keldervloer. Maar dat is ook geen wonder als je al meer dan 50 jaar steeds aardappelen op je hoofd hebt liggen, daar zat vast wel eens een rotte pieper tussen, toch 😉?!
 
The rest of grouting the tiled floor went smoothly and looked good, I liked it, but that piece of teh floor under the basement stairs…? There I started by pulling off that thick layer of "grout" in order to see if I could take it off. No, of course not, and to make it all worse, the paint layer also tore off. I than decided to paint the damaged layer again with some thinned paint and then add some grout over it. The result: a damaged basement floor. But that's no wonder if you've always had potatoes on your head for more than 50 years, now and than there must have been a rotten potatoe in between, right 😉?!


Nou, de keldervloer is betegeld zoals het hoort in deze boerderij, maar ik heb van al dat puimsteen geen vingerafdruk meer op mijn vingers 😬.
Nu kijken wat het volgende karwei gaat worden, dat is altijd een verrassing als je de boerderij van je grootouders in miniatuur na wilt bouwen. En door ook nog een beetje dicht bij de traditionele streekbouwwijze te willen blijven, kom je nog al hordes tegen, maar dit soort uitdagingen zijn altijd leuk!
Dank voor jullie fijne reacties, een hele mooie week gewenst.
 
Well, the basement floor is tiled as it should be in this farmhouse, but I don't have a fingerprint/profile on my fingers from using lots of pumice stone 😬.
Now let's see what's going to be the next job, that's always a surprise if you want to recreate your grandparents' farm in miniature. And also by wanting to stay a little close to the traditional and regional construction method, you will encounter hurdles, but these kinds of challenges are always fun!
Thank you for your kind comments, I wish you a lovely week.

 
Ilona

vrijdag 12 februari 2021

Sneeuwwit en bloedrood / Snow white and blood-red


Vorige week zaterdagavond, gevolgd door de hele zondag, trok storm Darcy over een groot deel van Noord-Europa, dus ook over Nederland. De harde ijzige oostenwind en de bitterkoude temperaturen, die het startsein gaven voor een code rood, brachten ons land bijna tot stilstand.
Toen ik de volgende dag ’s morgens op de buitenthermometer keek, zag ik deze eigenaardige schaalverdeling…..ach, ik was na onze snikhete zomer, met temperaturen tot wel 43oC!, vergeten de kwikstand te herstellen. De thermometer vertelde mij dat er dus 48 graden!! verschil in zat, wauw 😋!!
 
Last Saturday night and the whole next day, last Sunday, the storm Darcy passed over a large part of Northern Europe, including the Netherlands. The strong icy eastern wind and bitter cold temperatures, which gave the go-ahead for a code red, almost brought our country to a standstill.
When I looked at the outdoor thermometer on Sunday in the morning, I saw this peculiar scale .....ah, I had forgotten to reset the mercury level after our very hot last summer, with temperatures as high as 43oC in our region! The thermometer told me that there was a difference of 48 degrees (Celsius), WOW 😋!!


Sinds die tijd ligt er in het grootste deel van het land zo'n 10 cm sneeuw, maar hier in het uiterste oosten ligt een dikke sneeuwdeken van ruim 40 cm en dan heb ik het nog niet over de hoge sneeuwduinen die door de ijskoude oostenwind zijn opgeworpen tot wel meer dan één meter! Zoveel sneeuwval hebben we hier al heel lang niet meer gehad, dus is er nu naast ongemak ook heel veel sneeuw- en schaatspret voor jong en oud.
Voor mijn kleinzoon is het dikke pret, want zeg nou zelf: als je 2,5 jaar oud bent, nog niet veel sneeuw bent gewend en je kunt je buiten zomaar laten vallen zonder dat het pijn doet, dan is dat toch ook ’n ultieme belevenis, hahaha, dat was zo leuk om te zien via een livestream 💝! Maar……op een slee gaan zitten dat is nog een stap te ver: dat enge ding dat glijdt onder je vandaan, oei, dus dan holt hij er maar achteraan en valt hij steeds maar weer in die zachte sneeuw, ook leuk om te doen😉!!
 
Since that time there has been about 10 cm of snow in most of our country, but here, in the utter eastside, there is a thick snow blanket of more than 40 cm and I am not even talking about the high snow dunes that are caused by the icy east wind and were thrown up to more than one meter! We haven't had that much snowfall here for a long time, so now, in addition to discomfort, there is now also a lot of snow and skating fun for young and old.
It is big fun for my grandson, because let's face it: if you are 2.5 years old, you are not used to much snow yet and you can just drop outside without it hurting yourself, then that is also the ultimate experience, hahaha, it was so nice to watch him via a live stream 💝 ! But …… to sit on a sled that's still a step too far: that scary thing that slides away under you, iew, so then he just run after the sleigh and falls over and over in that soft snow, also nice to do 😉!!

Ik had bewust net voor deze enorme sneeuwval een foto gemaakt van mijn tuin en boeddha beeldje om te kijken om hoeveel sneeuw het zou gaan, nou kijk zelf maar:
 
Just before this huge amount of snowfall I had deliberately taken a picture of my garden and Buddha statue to see how much snowfall it would be, well, see for yourself:


En sinds een aantal weken zit er op mijn schutting een luidruchtige pimpelmees, hij is druk bezig om een vrouwtje aan te trekken, om bij hem in te trekken in zijn riante vrijstaande vogelwoning. Vorige week is hem dat uiteindelijk gelukt, na veel kabaal op de schutting, en het  echtpaar pimpelmezen was al druk bezig om hun woning om te toveren in een knusse warme kraamkamer. Ik zie ze nu en dan ondanks de kou gewoon buiten naar voedsel zoeken, maar ik denk dat ze beter even kunnen wachten anders krijgen hun pasgeborenen niet genoeg en vers eten……tja, de natuur houd je niet tegen hè?!
 
And for a number of weeks now, a very noisy blue tit has been sitting on my fence, he is busy attracting a female for moving in with him in his spacious detached (bird) house. Last week he finally succeeded, after  a lot of noise on the fence, and the just married couple of blue tits were already busy converting their home into a cozy warm nursery. Despite the cold I see them now and than just looking outside for food, but I think they better should wait a while, otherwise their newborns will not get enough of fresh food... well, Mother nature won't stop you, right?!

Heb ik dan niets anders gedaan dan vrachten sneeuw wegscheppen en dubbel genieten van alle kinderen die hier buitenspelen in karrevrachten sneeuw?
Ja hoor, ik ben begonnen met het maken van traditionele rode estrikken  (vloertegels), die in de jaren ’50 op de keldervloer van de boerderij lagen. Het was even zoeken naar een geschikte restant van MDF, gelukkig had ik nog iets en is het wel te dik, maar pluspunt hiervan is dat de kelder van de boerderij dan wèl een stevig fundament krijgt ;).
 
Did I do nothing else but just shovel loads of snow and enjoy double the fun of all the children playing outside in cartloads of snow?
Yes I did, I started making red screeds(?) (earth red floor colored traditional tiles) that were on the basement floor of the farmhouse in the 50s. It took some searching for a piece of suitable leftover MDF, luckily I still had something, it is too thick, but the plus of this is that the cellar of the farmhouse does get a solid foundation ;).


Ik maak de keldertegels van passe-partout karton van 1,5 mm dik, die ik beschilderd heb, met gebruik van een make-up sponsje, in een mooie warme kleur roodbruin (acrylverf). Ik gebruik 3 verschillende tinten roodbruine acrylverf en ik werk snel met behulp van de techniek “nat-in-nat” op het karton. Tussendoor schuur ik de vloer, na goed drogen, geregeld op met ultra fijn schuurpapier maar druk ik NIET op, eigenlijk is het meer vederzacht “aaien”. Na een aantal keren schilderen en schuren, heb ik de vloer afgewerkt met crème was voor krijtverf.
 
I make the basement tiles from 1.5 mm thick passe-partout cardboard, on which I painted, using a make-up sponge, several layers in a nice warm color reddish brown (acrylic paint). On this passe-partout board I paint in 3 different shades of reddish brown of acrylic paint and I work quickly by using the technique of “wet-in-wet”. In between, I regularly sand the floor with ultra fine sandpaper but do NOT press on it, in fact it is just feathery soft “stroking”. After painting and sanding afew times, I finished the floor with cream wax for chalk paint.

Maar door de vele sneeuw buiten in combinatie met de fel schijnende zon, die nu ‘ultra fel daglicht’ naar binnen reflecteert, waardoor de tegels een bloedrode kleur krijgen, die in het echt absoluut NIET te zien is :O. Op bovenstaande foto komt de roodbruine aardkleur het dichts bij die hoe de kleur eigenlijk is. Nu komt het proces van tegeltjes snijden van 20 x 20 mm, dus ik heb de komende tijd weer wat te doen.
Voor wie nog gaat schaatsen of sleetjes rijden: let op de Corona maatregelen en de veiligheid. Let goed op want het ijs is niet overal dik/sterk genoeg, maar desondanks: veel sneeuw- en schaatsplezier!!
Blijf veilig, zorg goed voor elkaar!
Ik heb nog steeds problemen met mijn lezerslijst op het dashboard van mijn blog (ik krijg geen updates van nieuwe blogberichten). Dus ik hoop dat ik bij elk van jullie laatste berichten een reactie heb achtergelaten…?
Dank voor jullie fijne reacties, een heel fijn weekeinde toegewenst!

 
But because of sooo much snow outside, in combination with the bright shining sun, which is now reflecting indoors the ‘ultra bright daylight’, giving the tiles a blood red color, which is absolutely NOT so at all in RL :O. In the photo above, the reddish brown earth color comes closest to what the color actually look like in RL. Now comes the process of cutting tiles of 20 x 20 mm, so I have something to do for the coming days.
Stay safe, take care for each other!
I still have problems with my readers list (no updates of new blog messages) on my Blogger dashboard. So, I hope I was able to leave for each of your last blog messages a comment…?
Thank you for your kind comments, have a nice weekend!

 
Ilona

zaterdag 6 februari 2021

Proost, op de start van de bouw / Cheers, for starting the build


Nu ik dan eindelijk ben begonnen met de bouw van mijn mini boerderij, heb ik mezelf voorgenomen om hier de tijd voor te nemen. Dat moet ik ook wel want vanwege de harde lockdown zijn alle winkels gesloten, inclusief de bouwmarkt om er eventueel wat hout te kunnen laten zagen. Dus…..bouw ik met beleid, en gebruik deze 8 cm hoge glaasjes om op zekere hoogte te komen, en neee, níet om “boven mijn theewater” te komen (voor wie het gezegde niet kent: of dronken worden), hahaha 😅.
 
Now that I have finally started building my mini farmhouse, I have decided to take the time for this project. I'll have to do that because, due to the hard lockdown, all shops are closed, including the DIY's, for having some wood cut if necessary. So…..I'm trying to build with care, and I use these small glasses of 8 cm high to get on a certain height, and nooo, not (for being in my cups, is this an English saying??), or for getting drunk, hahaha 😅.

Zoals je in mijn vorige blogbericht al kon zien, was ik op het idee gekomen om met de kelder te beginnen. Ik dacht: dat wordt een soort doos, waaroverheen ik dan (tot op een bepaalde hoogte) de opkamer, als een soort van deksel, kon laten zakken. Gewoon een doos maken waarvan alle wanden de gelijke hoogte zullen hebben…
 
As you could see in my previous blog post, I got the idea to start with the basement of the farmhouse. I thought it would just be a kind of box, over which I could (to a certain height) lower the up stairs room, being a kind of lid. Just making a box ofwhich all walls will have the same height...

Maar ik had geen rekening gehouden met de ingang van de kelder, die op de begane grond begint en onder de opkamer in de kelder eindigt. Tja, kan gebeuren, maar het kostte mij enorm veel hoofdbrekens en tijd om dit te krijgen zoals ik wilde en met de beperkingen die ik had. En zoals gezegd: het moest ineens goed gebeuren want even een nieuw stukje MDF laten zagen is er niet bij tegenwoordig, óók al omdat ik in zelfisolatie zit vanwege mijn gezondheid.
 
But I hadn't count on the entrance to the basement, which starts on the ground floor and ends under the up stairs room, in the cellar. Well, can happen, but it took me a lot of troubles and time to get this done as I wanted and with the restrictions I had in this space. And as I said before: it has to be done right all of a sudden, because having a new piece of MDF sawn is not an option nowadays, also because I am still in self-isolation because of my health.


Dus toen ik uit restjes MDF de wanden van de kelder had gezaagd en ze (met enige millimeters ruimte) vanaf de onderkant keurig in de opkamer pasten, was ik best tevreden. Maar toen ik de tussenwand op zijn plaats wilde laten zakken, ging dat natuurlijk niet.
 
So when I sawed the walls of the basement from scraps of MDF I still had and they (with a few millimeters of space) fitted neatly under the floor of the up stairs room, I was quite satisfied. But when I wanted to lower the partition into place, I then saw that it was not possible, of course. 


Er moest een stuk van de tussenwand afgezaagd worden maar dat had ik niet op mijn zorgvuldig gemaakte plannen staan. Nieuwe tekeningen/berekeningen werden gemaakt en zoals dat vaak gebeurd: er kwam steeds weer iets nieuws bij kijken, hetzij in de vorm van een probleem, of een mogelijkheid. Kortom, het was niet eenvoudig om te doen, maar na dagen van tekenen, passen en meten en weer voorzichtig millimeters eraf zagen is het me gelukt, pffffff. Op bovenstaande foto’s zie je waar wat af moest en waar NIET, niet gemakkelijk om zomaar te doen. Maar nu past het allemaal wel precies onder de vloer van de opkamer (=zwarte bovendeel) en op de randen van de glaasjes om het hoogteverschil te creëren dat nodig is. Tevens heb ik de ingang van de kelder weten te realiseren, maar hierover meer in een volgend blog bericht.
 
There was a piece to be sawn off from the partition wall, but I didn't count on that in my carefully made plans. The result was: new drawings/calculations had to be made and as is often the case: something new came up again and again, either in the form of a problem, or an opportunity. In short, it was not easy to do, but after days of drawing, fitting and measuring and again carefully sawing millimeters off the walls, I managed to do it, phew. In the above photos you can see where things had to be done and where NOT, not an easy thing to do. But now it all fits exactly under the floor of the upstairs room (= black top part) and it rests on the edges of the tiny glasses for creating the needed difference in height.  I also managed to realize the entrance to the basement, but more about this in a  coming blog post.


Gelukkig werd er hier op de foto's indoor op nepsneeuw geoefend want inmiddels waait er een ijzige wind en zal Kleine Ikke haar montycoat hard nodig hebben 😉

Fortunately, here in the photos, there was practiced indoors and on fake snow, because meanwhile an icy wind is blowing and Little Me will badly need her monty coat 😉


In Nederland is het aankomende barre winterweer groot in het nieuws: vanuit het oosten zijn een flink pak sneeuw en ijselijke temperaturen onderweg!! Zou het voor het eerst in jaren dan eindelijk weer eens écht winter worden?? Nou, we zullen het gaan zien.
Mijn sneeuwbeertje Schepje, gemaakt door Birgit, blog: https://biwubaer.blogspot.com/ kan zijn lol niet op. Hij is aan het oefenen om te snowboarden op zijn sneeuwschep en heeft ook alvast de slee van zolder gehaald. Samen met Kleine Ikke zijn ze van een berg sneeuw aan het afroetsjen, wat een lol. Een sneeuwschep is niet alleen handig om te 'snowboarden', je kunt er ook je kleine zusje mee omhoog takelen als ze met haar sleetje onderaan de bult staat te wachten totdat je haar komt helpen 😁
Ik wens hierbij iedereen veel sneeuw- en ijspret toe, maar denk alsjeblieft om de corona maatregelen. Blijf gezond en zorg goed voor elkaar 💖!
Dank voor jullie fijne reacties, een heel fijn weekeinde toegewenst.

 
In the Netherlands, the coming harsh winter weather is trending in the news: a lot of snow and icy temperatures are on the way from the east!! Would it be really winter again for the first time in many years? Well, we'll see.
My snow bear Schepje, made by Birgit, blog: https://biwubaer.blogspot.com/ has sooo much fun. He is practicing snowboarding on his snow shovel and has already taken out the sledge from the attic. Together with Little Me they are sliding down a mountain of snow, what fun. A snow shovel is not only useful for 'snowboarding', you can also use it to pull up your little sis when she is waiting for you to come and help her with her sled at the bottom of the snow bump 😁
I wish everyone a lot of snow and ice fun, but please, think about the Corona measures as for the required distance. Stay healthy and take good care of each other 💖!
Thank you for your kind comments, wishing you a lovely weekend.

 
Ilona

zaterdag 30 januari 2021

Eindelijk begonnen / Finally got started

Zoals velen van jullie weten, heb ik het al jaren over mijn miniatuur boerderij, die ik zou gaan bouwen. Nou, na rijp beraad bij mezelf en de situatie waarin we ons bevinden, heb ik besloten dat nu de tijd is gekomen om er eens serieus aan te beginnen, hè hè, eindelijk!
Maar waarom heb ik dan al die jaren gewacht?
 
As many of you will know, I've now been talking for years about my miniature farm I was going to build. Well, after careful consideration and the situation we find ourselves in, I've decided that now is the time to get serious about this, finally!
But why have I waited for all these years?


Nou, omdat ik zelf de tekeningen voor de bouw van deze mini boerderij moest tekenen en vooral omdat ik (buiten de buitenmaten om die ik eindelijk kreeg in 2019) totaal geen afmetingen en bouwgegevens heb die hiervoor nodig zijn.
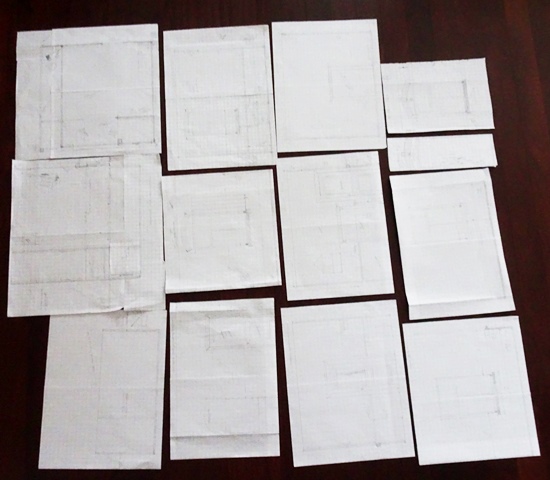
Geholpen door slechts een paar oude wazige foto's uit de jaren 50 als referentiekader, mijn eigen jeugdherinneringen en de gesprekken die ik had met (inmiddels overleden) familieleden in de jaren 90, maak ik zelf deze tekeningen sinds de afgelopen twee weken. Deze tekeningen zijn dus nodig om de boerderij van mijn grootouders zo echt mogelijk na te maken. 

Well, that is because I had to draw the drawings myself for the construction of this miniature farmhouse and especially because (except of the outer dimensions I finally got in 2019) I have absolutely no dimensions and construction data that are needed for this project.
Helped by only a few old blurry photos from the 50s as a frame of reference, my own memories of my childhood and the interviews I had with (passed away by now) family members in the 90s, I have been making these drawings myself for these past two weeks. So, these drawings are necessary to be able to recreate my grandparents' farm as real as possible.

Een ander bijkomend probleem is dat deze boerderij op traditionele wijze is gebouwd in 1909. Dat wil zeggen dat de ‘vaklui’ die het gebouwd hebben dat deden volgens traditionele werkwijzen en niet volgens bestaande (op papier) bouwplannen. De werkwijzen werden namelijk mondeling doorgegeven van vader op zoon, of opvolger, en niet beschreven op papier. Jaren geleden heb ik echter een boekje gevonden, waarin iemand deze traditionele werkwijzen heeft toegelicht en opgeschreven, vergezeld van een aantal tekeningen. De schrijver interviewde hiervoor oude ambachtsmannen en heeft alles wat hij te weten kwam opgeschreven en in boekvorm uitgegeven.
Desondanks heb ik via internet nog geprobeerd te zoeken naar de benodigde informatie over de ornamenten/versieringen, die aan de buitenkant te zien zijn op deze boerderij. 
Kortom, veel voorbereidend werk.
 
Another additional problem is that this farm was built in 1909 in the traditional way of the region. That is to say that the "craftsmen" who built it, did this according to traditional methods and not according to existing (paper) building plans. These building methods were passed on spoken from father to son, or successor, and not described on paper. However, years ago I found a booklet in which someone explained and wrote down these methods, accompanied by a number of drawings. The writer interviewed old craftsmen about these traditional building crafts and he wrote down everything he learned and published his findings in a book.
Nevertheless, I still tried to search on the internet for the necessary information about the ornaments/decorations, which can be seen on the exterior of this farm. 
In short, a lot of preparatory work.

Gelukkig had ik al in 2019 een aantal (MDF) delen van de miniatuur boerderij op maat laten zagen in de bouwmarkt. En zoals altijd vroeg ik toen ook  om de stukken MDF die overblijven na het zagen en nam ze mee. Blijkbaar had ik toentertijd een vooruitziende blik want nu tijdens de pandemie komt dat afvalmateriaal mooi van pas, later meer daarover 😉.
 
Fortunately, in 2019 I already gave orders for sawing to size a number of (MDF) parts of the miniature farm in the DIY store. And as always, I then also asked for the pieces of MDF that remain after sawing and took them with me. Apparently I had foresight at the time because now during the pandemic these leftovers comes in handy, more on that later 😉.


Ik ben begonnen met het in elkaar zetten van de slaapkamer van mijn oma en opa, de zogenoemde opkamer, meer informatie hierover: https://nl.wikipedia.org/wiki/Opkamer
Maar terwijl ik de muren aan het schilderen was met witte gesso, bedacht ik dat het leuk zou zijn om ook de half in de grond verzonken kelder, die onder de opkamer was gesitueerd, te maken. Dus werd er al direct van het plan afgeweken en een zijspoor opgegaan, hihihi 😅😇.
 
I started assembling the 'opkamer', or up stairs room of my grandparents, the so-called up stairs room. But as there is no page of an ‘opkamer’ in the English wikipedia, I translated the Dutch version for you in English, I hope it is helpful.
(A Dutch 'opkamer', or up(stairs) room is a room that is situated higher than the adjoining rooms of a house. The reason for this is usually that there is a semi-sunken basement below this room. The upstairs room is accessible via a staircase of a few steps, or a step that is sometimes placed on the sloping cellar hatch).
But while I was painting the walls with white gesso, I thought it would be fun to also make the semi-sunken basement, which was situated under this upstairs room. So there was already immediately deviated from the first plan and I got sidetracked, lol 😅😇.


Ik was al van plan om een verhoogde vloer in deze slaapkamer module te maken, dus dacht ik als ik nu van wat restant MDF materiaal de keldermuren uitzaag dan kan ik die aan de binnenkant onder die slaapkamervloer inbouwen. Mocht ik de boerderij gebruiken voor mini scènes dan kan ik dat doen mèt en zonder de kelder. Voor het maken van de kelder had ik net genoeg MDF, dus werd er weer gemeten en weer getekend en weer op maat gepast. Trouwens, heb je wel eens een flinke stuk MDF kaarsrecht gezaagd met een klein zaagblad op de minizaagmachine? Ja? Dan weet je ook dat dat niet zo gemakkelijk gaat, dus gelukkig ging het om de keldermuurtjes die aan de binnenkant vallen.
 
I already had planned to make a raised floor in this up stairs room module, so I thought if I cut out the basement walls from some leftover MDF material, then I could build in these walls on the inside under that bedroom floor. If I'll use the farm for mini scenes, I can do that with and without the cellar. I had just enough MDF to make the basement, so it was measuring again, drawing again and fitted to size again. By the way, have you ever tried to cut dead straight quite some length MDF with a small saw blade? If so, you'll also know this is not easy, so luckily it was about the basement walls which will be situated on the inside.

Ook moeten er nog een paar vloer/zolder balkjes komen en er moet nog een raampje in gemaakt worden dat net boven de begane grond niveau uit komt.
Daarom moest mini Oma er even bij komen om te zien of ze rechtop in de kelder kon lopen, want ik herinner me dat mijn eigen oma dat ook maar net kon in de echte kelder in hun boerderij.
 
There must also be a few floor/attic beams and a window must be made that rises just above the ground floor level.
Therefor Mini Grandma had to be there to see if she could walk upright in the basement, because I remember my own grandmother could barely do that in the real cellar in their farm.

Zo te zien past ze in de kelder, nu verder en zien wat er nog meer aangepast moet worden.
Dank voor jullie fijne reacties, allemaal een mooi weekeinde toegewenst.

 
As you can see she fits in the cellar, now I’ll go on and I'll see what more adjustments I have to make.
Thank you for your kind comments, have a lovely weekend.

 
Ilona

maandag 25 januari 2021

Speculaasje..? / Speculaas biscuit..?

Begin januari schreef ik op mijn blog dat ik speculaaskoekjes wilde gaan bakken, het duurde even maar nu zijn ze klaar ;). Waarom duurde het zo lang? Nou, dat kwam omdat ik de malletjes voor dit soort koekjes (gekocht bij Arjen Spinhoven, website: https://arjenspinhoven.nl/nl/Scale_1_12/Biscuitmolds ), maar de koekjes wilden niet goed uit de malletjes komen na bakken. Het vervelende was dat mijn mooie malletjes (van MDF) nu kapot zijn gegaan. Voordat je het zegt: ja, ik wéét dat je MDF niet kunt bakken in de oven, of er vettige klei in moet doen, maar ik wilde zo graag speculaasjes voor mijn mini Oma bakken….
Ik heb contact opgenomen met Arjen hierover en hij zou hiernaar kijken, helaas heb ik nadien nog niets van hem gehoord. Maar dat komt nog misschien…ik hoop ‘t.
 
At the beginning of January I wrote on my blog that I wanted to bake speculaas biscuits, it took a while but now they are ready ;). Why did it take so long? Well, that was because I bought the molds for making this sort of cookies (bought from Arjen Spinhoven, website:
https://arjenspinhoven.nl/nl/Scale_1_12/Biscuitmolds ), but after baking the speculaas biscuits wouldn't come properly out of the molds. The annoying thing was that my beautiful molds (from MDF) have now broken. Before you'll say: yes, I know you can't bake MDF, or put in greasy and sticky clay in these molds, but I really wanted to bake these speculaas biscuits for my mini Grandma….
I contacted Arjen about this and he would look into this, unfortunately I haven't heard from him yet since. But maybe that will come… I hope so.
More information about this sort of biscuits: https://en.wikipedia.org/wiki/Speculaas

Ik heb 4 verschillende speculaasplankjes, hierboven staan de grotere speculaaspoppen, ze zijn ongeveer 25 mm hoog. Deze poppen kwamen redelijk goed uit de malletjes, maar de kleine uit gelaserde tussenstukjes óók. Zo jammer :O!!
 
I have 4 different speculaas doll shaped biscuits, above are the larger speculaas biscuits, they are about 25 mm/1 inch high. These dolls came quite well out of the molds, but so did the small lasered details also broke off in the molds. Such a pity :O!!

De kleinere speculaasjes (8 mm hoog) waren ook best goed gelukt, maar zoals je kunt zien zijn de figuurtjes van deze mal redelijk diep gelaserd, dus waren de speculaasjes te dik om 1:12 schaal te zijn. Wat nu?
 
The smaller speculaas biscuits (8 mm high) were also quite successful, but as you can see the figures of this mold are quite deeply lasered, so the speculaas biscuits were too thick for 1:12 scale biscuits. What to do now?

Dit is het speculaasje uit de oranje cirkel, ik dacht dat ik héél ietsjes van het reliëf zou weg schuren zodat de dikte van het koekje meer in verhouding zou komen…..helaas verdween toen het hele reliëf, jammer!
 
This is the speculaas biscuit from the orange circle, I thought I would sand (very slightly) away the relief so that the thickness of the biscuit would be more in proportion….but unfortunately the entire relief disappeared, too bad!


Hierop besloot ik de achterkant te schuren door de speculaasjes zachtjes en één voor één over een fijne nagelvijl te duwen. Dit werkte wel, en het bracht mij op het idee om de koekjes even vochtig te maken en daarna met het schuurstof weer terug in te wrijven. Hierdoor leek het meer een koekje van deeg dan eentje gemaakt van Fimoklei ;O). Zo heb ik ook de grotere speculaaspoppen op deze manier afgewerkt, zie boven.

It was then that I decided to sand the rearside of the biscuits, by gently pushing the speculaas one by one over a fine nail file. This worked, and it gave me the idea to moisten the cookies and then rub them back in with this sanding dust. This also made it look more like a biscuit of dough than one made of Fimo clay ;O). This way I also finished the larger speculaas doll shaped biscuits (see above).

Hierboven zie je een van de afgewerkte speculaasjes, ze waren bijna niet vast te pakken tussen duim en wijsvinger (ik heb zelfs mijn vingertoppen er bijna afgeschuurd ;O)), maar ik ben blij met dit resultaat. Nu maar hopen dat Arjen een ander soort mal voor het bakken van speculaasjes kan maken ;)!!
 
Here above you see one of the finished speculaas biscuits, they were almost impossible to grab between thumb and forefinger while sanding (I even almost sanded off my finger tops ;O)), but I am happy with this result. Let's hope Arjen can make a different kind of mold, one for baking speculaas biscuits ;)!!


Intussen ben ik begonnen om mijn plannen op papier te zetten voor het maken van mijn mini boerderij. Inmiddels duurt mijn zelfisolatie al maanden en het lijkt er op dat we hier nog wel maanden mee zoet zijn voordat er gevaccineerd gaat worden en het leven weer wat normaler zal worden. Daarom heb ik besloten om aan mijn eigen miniatuurwerk te gaan werken, ik heb er echt zin in!
Blijf gezond en veilig, zorg goed voor elkaar!
Dank voor jullie fijne reacties, een fijne week toegewenst!
 
In the meantime, I have started drawing my plans on paper for creating my mini farm. In the meantime my self-isolation has been going on for months and it seems that we will be busy with this for months before the vaccinations will start and life will become a bit more normal again. That's why I decided to start working on my own miniature work, I'm really looking forward to it!
Stay healthy and safe, take good care of each other!
Thank you for your kind comments, have a nice week!

Ilona