my e-mailaddress


maandag 11 februari 2019

Niet gluren… / Don’t peek…


Nog een karweitje, waar je ‘vieze’ handen van krijgt.
Als toiletpapier werd vroeger ook wel krantenpapier gebruikt, dus werd Kleine Ikke aan het werk gezet door Oma: kranten scheuren, in velletjes van 15 x 15 cm.
Zo te zien waren het hele oude kranten, zelfs voor de jaren ’50, want er staan Nieuwjaarswensen op voor 1947 ;).

Another job, of which you get ‘dirty’ hands.
In earlier times newspapers were used as toilet paper, so Little Me was put to work by granny: tearing up newspapers, into sheets of 15 x 15 cm (about 6 inches).
It seems that these newspapers were very old, even for then (the 50s), because on the newspaper are the New Year wishes for 1947 ;).


Opa gaf haar een stuk rond gebogen ijzerdraad, waaraan Kleine Ikke de velletjes papier moest prikken, om daarna op gehangen te worden aan een spijker in het toilet. Als je mijn vorige blogpost gelezen hebt, kon je het wc papier al zien hangen (zie de eerste foto).

Grandpa gave her a piece of curved bent wire, whereon Little Me should prick the paper sheets, after than it was hung up on a nail in the loo. If you’ve read my previous blogpost, you could have seen the toilet paper hanging at the wall already (see the first picture).


Haar beloning na haar klusje (van het scheuren van de kranten tot kleine velletjes) was dat opa altijd een hoed van het overgebleven krantenpapier voor haar vouwde om mee te spelen :O).
Intussen werd het tijd voor een bezoekje aan het toilet, iets waar Kleine Ikke, als ze op de boerderij was,  niet echt van hield. Maar ze moest echt gaan, dus…

Her reward after her job (of tearing up the newspapers to tiny sheets) was that grandpa always folded her a hat from the leftover newspaper to play with :O)
Meanwhile it was time for visiting the loo, something Little Me didn’t like much, when she was at the farm. But she had to go, so…

Hier zal ik laten zien hoe ik de deur van het toilet heb gemaakt:
Here, I'll show you how I made the door of the toilet:


Deur is gemaakt van passepartout karton 
Door is made of passepartout cardboard


Scharnieren van de het cupje van een waxinelichtje 
Hinges of the aluminum cup of a tealight


Dunne lagen met water verdunde acrylverf 
Thin layers of acrylic paint, diluted with water


Closeup scharnier, geplakt tussen de lagen karton 
Close-up of the hinge, glued in between the layers of cardboard


Oma ging met haar mee en hield de deur voor haar open, de wc zat in een donkere hoek van de deel, meteen naast de koestal. Voor volwassenen zat er een grendel bovenaan op deze deur, want pottenkijkers waren niet gewenst, hihihi.

Grandma accompanied her and kept the door open for her, the loo was in a dark corner of the treshing floor, right next to the cowstable. For adults there was a bolt at the upperside of this door, because voyeurs/peekers (?) weren’t desirable, hehehe.


Nadat oma haar had beloofd om voor de deur te blijven staan, op de uitkijk, ging Kleine Ikke gauw naar binnen om een plasje te doen. Toen zag ze de kier boven de deur, die daar zat om in de wc te kunnen komen als iemand zich per ongeluk ingesloten had. Oma…..?! Ja?? Niet gluren, hoor ;O!!
Bedankt voor jullie reacties, ik wens jullie een fijne week!

After grandma promised her to stay before the door (on the lookout), Little Me quickly went inside for a pee. Then she saw the gap above the door, which was there in the loo to get to someone, who has accidently locked oneself in. Grandma…..?! Yes?? Don’t peek ;O!!
Thank you for your kind comments, I wish you all a nice week!

Ilona

maandag 4 februari 2019

Ligt de wasknijper voor op je neus klaar? / Is the clothespin ready to pop on your nose?


Voor de wc had ik een ander model in gedachten, maar waarschijnlij herkennen jullie dit wel: ik kon het niet meer terug vinden tussen mijn spullen ;O!
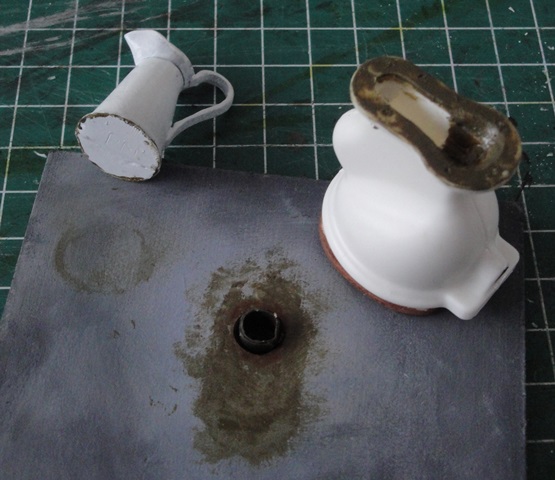
Maar oké, ik had nog een kit van Chrysnbon Miniatures, dus werd het deze. De waterkan heeft als merkje PM, ik weet niet meer op welke beurs en bij wie ik het gekocht heb, sorry.

I had another model in mind for the lavatory bowl, but probably you’ll recognise this: I couldn’t find it back in my stash ;O!
But okay, I still had a kit from Chrysnbon Miniatures, so it became this. The water jug is from the brand PM, I don’t know at what show and from who I bought it, sorry.


Vorige keer heb ik jullie verteld dat er nog geen stromend water was op de boerderij, dus werd de kan gebruikt om de wc door te spoelen. Dit leverde natuurlijk, in combinatie met wat er “afgeleverd werd” op het toilet, kalkaanslag en “viezigheid” op…..iets dat ik heb nagebootst met witte nagellak en okergele pastelkrijt. Eerst wat nagellak in de wc pot, meteen gevolgd door een heel klein beetje geraspte pastelkrijt en dat mengsel roer je (op gevoel) metéén door elkaar met een wattenstaafje. Gevolg: lekker vieze aanslag ;O!

In my last blog I told you that there was no running water at the farm, so the jug was used for flushing the toilet. Of course, this caused, in combination with "what was delivered on the loo", lime scale and “dirt”…..something I’ve imitated with white and beige nail polish and yellow ochre pastel chalk. First you drop a drop of both nail polishes in the lavatory bowl, immediately followed by just a little bit of grated pastel and you immediately have to stirr this mixture (by the feel) with a cotton swab. The result: a nice dirty lime scale ;O!


Om de wc pot op de riolering te laten passen, was het nodig om het gat aan de onderkant aan te passen tot de juiste wijdte. Ik heb dit met mijn Dremel gedaan, gelukkig was het geen porseleienen toiletpot ;). Daarna wat bruinige/groenige Humbrol verf op de onderkant van de pot en klaar is Kees, eh, de pot.

For a good fit of the lavatory bowl on the sewerage pipe, it was neccessary to adjust the hole at the underside until it was wide enough. I’ve done this job with my Dremel, good to know that the loo was not of porcelain ;). After that I painted a touch of brownish/greenish Humbrol paint at the underside of the loo and the job was done. (thanks to Sheila for giving the tip for making rust of cinnamon)


De bijbehorende wc bril heb ik weg gelaten, want er zaten twee houten halve brilranden op het toilet van oma. Ik heb ze gemaakt van dun triplex en met twee ingekorte koppen van naaispelden, als schroeven op de pot (met UHU plasticlijm)gelijmd.
Het gat achterin de toiletpot, waar normaal de spoeling door plaatsvind, heb ik dichtgemaakt met een zwarte rubber dop, zoals bij oma.

I left away the accompanying toilet seat, because there were two half wooden edges on the toilet of grandmother. I made them from thin bass wood and with two shortened heads of sewing pins, I glued them on the loo (with UHU glue for plastic).
The hole at the rear side of the lavatory bowl, whereby normally the flush water comes, is closed with a rubber stop, just as at my grandma’s loo.


Als je goed kijkt, kun je het water onderin de wc pot zien staan…zó, de wasknijper kan van de neus, want we gaan wat frisse lucht happen ;)!
Want op het toilet van Oma kwam wel wat frisse lucht binnen, via een klein klapraampje. Het mini exemplaar is gemaakt van passe-partout karton, een plastic verpakking en een naaispeld. Aan de hand van foto’s kun je zien hoe ik het gemaakt heb.

If you look well, you can see the water at the bottom of the bowl… thus, the peg can be taken of your nose, because we're going to get some fresh air;)!
Because at the toilet of grandma there was yet some fresh air coming in, by a very small swing(?) window. My mini window is made of passe-partout cardboard, a plastic packing and a sewing pin. I’ll show you how I’ve made it by pictures.


Voor een stevig raampje heb ik het karton aan beide kanten van het plastic gelijmd, de lange delen en korte karton delen om en om. Het karton is onder een hoek van  graden gesneden, zodat er geen licht doorheen kan schijnen en aan de onderkant dient de schuine hoek om het raam te openen, hiervoor heb ik de speld gebruikt, als scharnier. Het raamkozijn is gemaakt van 4 mm dik hout.

For a sturdy window, I glued the cardboard on both sides of the plastic, the long and the short parts of the cardboard are alternating. The cardboard is cut under an angle of  degrees, so that there will no light shine through and at the underside of the window the angle is used for opening the window, for this I used the pin, as a hinge. The window frame is made of wood 4 mm thick.


Het hout was een beetje beschadigd tijdens het zagen, daarom heb ik de gaatjes gevuld met Alabastine, geschuurd en in de grondverf gezet ;).

During the sawing I damaged the wood a little, therefore I filled in the gap with plaster, sanded it and gave it a layer of primer ;).


De haak om het raam tegen te houden is gemaakt van een stukje blik, ik heb het geschilderd met crèmekleurige nagellak, gewone verf pakt niet op blik.

The hook for preventing the window from fallen open, is made of a scrap of can, I painted it with cream colored nail polish, common paint won’t stick at can.


Om toch nog wat vliegen buiten de wc ruimte te houden, had mijn Opa een hor voor de buitenkant van het wc raam gemaakt. Zo eentje met van die klosjes, die in de winter er dan weer van afgehaald werd. Ik wilde ook een mini horretje, maar waar moest ik dat van maken…? In mijn spullenlade vond ik een stuk organza lint, maar er zaten vierkantjes van lijm met glitter op. Hoe kreeg ik die er van af, want het lint was precies fijn genoeg en had de juist kleur…

For keeping the flies outside of the lavatory, my grandpa had made a screen at the outside of the window. One with tiny holders, so that the screen could be removed again in winter. I also wanted to make such a screen, but of what could I make one…? In my stash I found a piece of organza ribbon, but there were tiny squares of glue and glitter on it. How could I get rid of that stuff, because the ribbon was just fine enough and it had the right color…


Eerst heb ik nagellak remover gebruikt, daar ging de glitter er wel mee af, maar de lijm bleef stug zitten. Toen herinnerde ik me dat in winkels een kleverig prijsje wel eens werd verwijderd met een beetje lampenolie. Het ging…..maar ik moest er wel verschrikkelijk hard op boenen!! Ondertussen was ik een beetje bang of al die wrijving geen brandje zou veroorzaken. Maar nee, na lang hard wrijven: géén brand, en wél de lijm eraf :O)!!
De gaatjes, die door al dat wrijven ontstonden, mochten van mij blijven: in oude horren zat wel eens een gaatje ;O.

At first I used nail polish remover, but only the glitter released, the glue stayed where it was. Then I recalled that in shops they used just a drop of lamp oil for removing most sticky price tags. It worked……but I had to rub very, very hard on it!! While I was busy I was a bit worried about all the friction, because it could cause fire. But no, after alot of rub: no fire, and the glue gave up and released :O)!!
The tiny holes, which arose through all that rubbing, were allowed to stay of me: in old screens there often were holes ;O.


Mijn Opa keek vast niet zo nauw, als hij wat latjes zocht voor horretjes als deze, dus paste het hout (dunner gesneden lucifers) ook niet overal in de hoekjes.

My grandpa was not so very particular, when it came to look for some slaths for making screens as this one, so the wood (thinner cutted matches) did not fit everywhere in the corners.


De klosjes zijn gemaakt van 2 x 4 mm hout (2 mm dik), een speld doet dienst als schroef, zodat het kan blijven draaien. Een tipje bruine nagellak doet dienst als roest.
En zo krijgt het toilet van Oma toch nog een fris appelgeurtje ;O)!!
Bedankt voor jullie fijne reacties, een fijne week gewenst.

The holders are made from 2 x 4 mm wood (2 mm thick), a sewing pin is used as a screw, so that it can stay turning. A tiny dot of brown nail polish serves as rust.
And this way the loo of grandma still gets a fresh apple odor ;O)!!
Thank you for your kind comments, have a nice week.

Ilona

woensdag 30 januari 2019

Laten we beginnen met de wc / Let’s start with the toilet


Nadat ik het besluit had genomen om met de bouw van mijn miniatuur boerderij in 1:12 te beginnen, kwam ook het plezier van miniatuur werken maken terug, pfiew, wat een opluchting ;O!
Kleine Ikke brengt een bezoekje aan het toilet op de boerderij (in de jaren ’50), Oma tilt haar er op want de closetpot is nog te hoog voor haar lengte 8,5 cm (in het echt 1.02 meter)…

After I made the decision to start the build of my miniature farm in 1:12, the fun of making miniature works came back to me, phew, what a relief ;O!
Little Me is visiting the loo on the farm (in the 50s), Grandma is lifting her up, because the lavatory bowl is just too high for her length of barely 3 1/2 inch/1.02 meter (about 40 inch in RL)…


Ik heb een aantal onderdelen van het werkgedeelte van de boerderij laten zagen bij de bouwmarkt, ook de muren en vloer van de wc. De muren zijn, zoals gebruikelijk bij een oude boerderij, ‘gewit’, ik heb hiervoor Gesso van Talens gebruikt. De gesso is met een varkensharen platte kwast van boven naar beneden op de muren gestreken, zó dat je de penseelstreken goed kunt zien. Na een dunne laag over de hele muur, heb ik de onderzijde op  5 cm afgeplakt met schilders tape. Daarna heb ik dit herhaald op de bovenste delen van de muren, de gesso is dun uitgestreken op een manier waarbij de muur een soort ‘transparantie’ krijgt.

At the sawing mill department of the DIY I asked for sawing some parts for the farm, including the walls and the floor for the toilet. The walls are 'whitewashed', as was common use for old Dutch farms. I've used white Gesso from Talens. With a flat paintbrush (pigshair) the Gesso is painted from above to downwards on the walls so that you can see the brush strokes. After one complete layer over the whole surface and I taped off for 5 cm at the underside of the walls with painters tape. Then the gesso is painted again in a thin layer for the upperside of the walls, the way it seems like the wall get a sort of ‘transparance’.


Om verschillende redenen werd de onderste 50 cm van de muren van boerderijen zwart geschilderd. Dit heb in miniatuur vertaald door Talens acrylverf in de kleur oxide zwart te gebruiken, de verf is karig opgebracht met een goedkoop make-up sponsje. Door hier en daar wat minder verf te gebruiken komen er vale plekken in de verf, waardoor je de muur een meer geleefd aanzien kunt geven.
Voor de vloer heb ik krijtverf gebruikt in de kleur houtskool, steengrijs en licht topaas.

The first 50 cm at the bottom of the walls from farms was painted black for several reasons. In miniature I've translated this by using acrylic paint from the brand Talens in the color oxid black, the paint is applied with a cheap make-up sponge. By using more or less paint you can give pale spots in the paint, this way you can give the walls a more used look.
For the floor I used chalkpaint in the colors charcoal, stonegrey and light heliotopaz.


Zo zien de muren en vloer er na deze verfbeurten uit, nu beginnen we met de riolering.
Wie niet goed tegen vieze luchtjes kan, kan dit stukje beter overslaan òf……een wc verfrisser bij de computer zetten, hihihi ;O!

This is how the walls look now after getting these layers of paint, now we'll start with the sewerage.
Those of you, who can't stand bad odors, can better skip this part in reading, OR... you can put a toilet spray next to your computer, hihihi ;O!


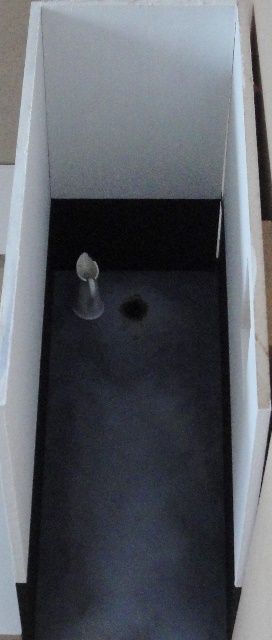
Aangezien de boerderij tot na de WO 2 een buitentoilet had, is er binnen in de koestal tegen de buitenmuur een plaats voor een koe opgeofferd ten bate voor het plaatsen van een echt toilet. Dat wil zeggen…..de riolering was er niet en daarom werd het toilet aangesloten op de zogenaamde beerput. Er was ook geen waterleiding dus werd er een grote email kan met water naast het toilet gezet om door te spoelen. Over vieze luchtjes gesproken…..
 Omdat deze blogpost anders veel te lang wordt, zal ik snel weer een blog schrijven over het vervolg van de bouw van het toilet, dus volgende keer wc spray bij de hand ;)!
Warm welkom aan mijn nieuwe volgers en dank voor jullie fijne reacties, fijne week allemaal!

Since the farm had an outdoor toilet until after WW 2, there had to be sacrificed the space for one cow in the cowstable, it was the one right next to the outside wall, all for the benefit of placing a real toilet indoors. That is to say ...the sewerage had not yet been laid out during that time and that's why the toilet was connected to the so-called cesspit. There also was no waterworks in that time, so there was standing a large enamel water jug next to the toilet for flushing. Speaking of dirty smells ..... 
Because this blogpost will be way too long to explain/show everything now, I’ll write a blog soon again about the continuation of the construction of the toilet. So next time keep the toilet spray at hand ;)!
Gracias/thanks to Pilar, for answering my question regarding the glue J!
A warm welcome to my newest followers and thank you for your kind comments, have a nice week!

Ilona

zaterdag 26 januari 2019

Tijdelijk op een zijspoor beland / Got sidetracked temporarily


Na een voor mij zeer bewogen decembermaand ontbreekt het mij aan energie om weer nieuwe mini bloemen en planten te gaan maken. Het maken van mini bloemen geeft me het gevoel van “moeten” en dat voelt niet goed voor mij, ik wil alleen mijn energie weer terug vinden. En hoe krijg ik die terug….? Juist, door (tijdelijk!!) weer eens even iets voor mezelf te maken en dat wordt mijn miniboerderij in schaal 1:12. Ik ben er al mee begonnen en het voelt super…..J!!

After eventful month of December for me, I'm lacking energy to make new mini flowers and plants again. Making mini flowers is now giving me the feeling of "I have to" and that's isn't well for me, I just want to find my energy back again. And how do I get my mojo back ...? Of course by (temporarily!!) making something in miniature again and for myself and that will be my mini-farm in scale 1:12. I’ve already started and it feels great…..J!!


Zoals jullie waarschijnlijk al weten heb ik  20 jaar geleden de boerderij van mijn grootouders al eens nagebouwd, in schaal 1:24. Zie mijn blogpost: https://minimumloon.blogspot.com/2012/12/boerderij-in-schaal-124-farm-in-124.html waarna ik nog een aantal volgende blogberichten over het exterieur en interieur van deze miniboerderij heb geschreven zijn, allemaal in dezelfde maand, in december 2012.

As you probably will know that 20 years ago I’ve already built the farm of my grandparents, in scale 1:24. See my blog post: https://minimumloon.blogspot.com/2012/12/boerderij-in-schaal-124-farm-in-124.html and I’ve written some following blog posts about the interior and exterior of this miniature farm, all in the same month, in December 2012.


Na wat meetwerk heb ik echter wat aanpassingen moeten maken in de bouwtekeningen van die boerderij (in schaal 1:24), omdat de schaal niet exact 1:24 was, eerder schaal 1:25.
Toen heb ik wat meubels, poppen en dieren op de tekeningen gezet om te zien of het klopte: nee, het klopte níet!
In de keuken werd er druk overleg gepleegd tussen grootouders en kleinkind: de keuken was zéker 5 cm te klein, voor hen betekent dat 60 cm te klein. Het kookfornuis komt dan namelijk vlak voor de tafel te staan en als daar iemand op een stoel zat dan zou die zijn billen verbranden en dàt is niet de bedoeling, dus, hup: 5 cm aan alle kanten uitbreiding voor de keuken ;O!

After some calculations I’ve made some adjustments in the plans of that farm (scale 1:24), because the scale wasn’t exactly 1:24, more scale 1:25.
I’ve than placed some furniture, dolls and animals in the plans to see if it was correct: NO, it was not!
In the kitchen a discussion was going on between grandparents and grandchild: this kitchen was for sure 5 cm too small, for them it means it's 60 cm lack of space. That way the stove would stand right in front of the table and if someone was sitting there on a chair that person would burn his buttocks and that is not the intention, so, hoppa: 5 cm on all sides extra extension for the kitchen ;O!


Voor de keuken had ik al wat miniaturen verzameld/gemaakt, dus heb ik een opstelling gemaakt van hoe het eruit zal gaan zien, nog niets is gelijmd. Weet iemand van jullie trouwens waar ik de mooie grijze leien/vloerplavuizen (van Romney Miniatures) mee kan vastlijmen op de MDF vloer..?

For the kitchen I’ve collected/made already some miniatures, so I’ve made a drawing up to see how it will look like, nothing is glued yet. By the way, is there someone of you, who knows which glue to use for gluing the wonderful grey slate floor tiles (from Romney Miniatures) on the MDF floor..?


Ook de dieren krijgen een plaatsje in de stallen. Kortom: hier krijg ik weer energie van! Ik ben blij met mijn besluit om na jaren eindelijk weer eens wat in miniatuur voor mezelf te gaan maken. Gewoon voor eventjes en zoals ik zei: het is tijdelijk totdat ik weer zin heb om nieuwe bloemen te maken ;)!!
Dank voor jullie fijne reacties, fijn weekend allemaal!

The animals will also get a place of their own in the stables. In short: this is how I’ll get back my energy! I'm glad with my decision for finally making again some miniature works for myself. Just for now and as I said: it’s temporarily until I got my mojo back again for making new flowers ;)!!
Thank you for your kind comments, have a nice weekend!

Ilona