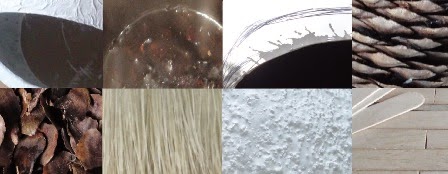
Het duurde langer dan voorzien, pfffff, mijn arme vingers, maar
het is gelukt :D!! Mijn dakpannen zijn klaar en (nog belangrijker) ze liggen op
het dak!
It took much more time than foreseen, phewww, my poor fingers, but I did it :D!! My roof tiles are ready and (more important) they are
on the roof!
a.jpg)
%2Bblog.jpg)
a.jpg)
Na het verven van elk van de dakpannen, kwam
het buigen van de stukjes karton om dakpannen te vormen. Ik heb hiervoor twee
dunne prikpennen gebruikt om ze omheen te rollen met als ondergrond een oude
zachte doek. Ze werden gelukkig goedgekeurd door Mevr. Kip ;O!
After I've painted each of the roof tiles, I had to bent all
the small pieces of cardboard in order to get their shape. For this purpose
I’ve used two thin prick pens, so I rolled the thin card board (on an old soft cloth) between the pens. They were approved by Mrs. Hen ;O!
a.jpg)
a.jpg)
a.jpg)
Voordat ik ze op het dak ging lijmen, heb ik een paar
panlatten op het dakoppervlak geplakt. En nadat die erop zaten, heb ik ze
geschilderd met donkerbruine acrylverf, zodat ze niet te zien zijn als de
dakpannen erop liggen.
Dit is de voorkant van het kippenhok (met 48 dakpannen), nu
de rest nog!
Before I glue them on the roof part, I’ve glued some slats
on the roof surface. And after the slats were glued in place, I’ve painted them
with dark brown acrylic paint, so that they aren't to be seen after the tiles
were placed on the roof.
This is the front gable of the hen house (with 48 of the roof
tiles), now the rest!
a.jpg)
a.jpg)
Eventjes achter om lopen, trap mee en nu doe ik de achterkant van het dak…..6x16=
oooh, nog maar 96 dakpannen te gaan :S!
First I go to the other side, take the ladder with me and for doing the back side of the roof………6x16= ooh, only 96 roof tiles to go :S!
.jpg)
a.jpg)
Na het leggen komt er op de bovenste rij dakpannen, tegen de
nok aan, een loodstrook om regen en vocht buiten het kippenhok te houden. De loodstroken zijn
gemaakt van gehalveerd (in dikte) dun karton, die ik heb beschilderd met metallic
grijze en grijsblauwe acrylverf om een realistische loodkleur te krijgen.
Daarna zijn ze op de bovenste rij dakpannen geplakt.
After the roof tiles were lying on the roof, there will be a
strip of lead on the upper row of roof tiles, against the ridge of the roof, in
order to keep rain and moisture out of the hen house. The strips of lead are
made of some strips of thin cardboard, which are cut in half (in the thickness)
and than I’ve painted them with metallic grey and grey blue acrylic paint to
get the color of realistic lead. After that I’ve glued them on the upper row of
roof tiles.
a.jpg)
a.jpg)
a.jpg)
Tegelijkertijd met de dakpannen heb ik ook wat nokpannen
gemaakt, ik heb ze op dezelfde manier bewerkt als de gewone pannen, maar dan in
een halfronde vorm. Daarna heb ik een nokbalk gemaakt van een plastic stukje
lat (ik had het nog in mijn spullen liggen) en een houten latje, waarop ik de
nokpannen heb gelijmd, zoals je kunt zien op de foto.
Together with the roof tiles I also made some ridge tiles
and I’ve shaped them with the same technique in a half round shape, so they
will fit on the ridge of the roof. The ridge pole is made of a plastic slat (I
had still in my stuff) and a wooden slat, on which I’ve glued the ridge tiles,
as you can see on the picture.
Forgive me my poor English, that’s why I’ve made some more
pictures to show the process ;D!
a.jpg)
Ik heb doorgewerkt totdat het te donker werd, waardoor ik alleen
nog deze foto kon maken: alle pannen zitten er nu op! Ik ben al iets verder dan
ik nu laat zien, maar dat komt in de volgende blog post….dus nog even geduld
alstublieft ;)!
Ik wil iedereen bedanken voor het lezen van mijn
blogberichten en elke reactie is erg fijn.
Ik wens jullie een heel fijn weekend :D!
I’ve worked until it was almost too dark to see well, so
that I still could make this picture: all of the roof tiles are glued in place!
I’ve already made some more progress, but I’ll show it to you in a next blog
post…..so, you must still have a bit of patience, please ;)!
I want to thank everyone for reading my blog posts and I’m happy
with each comment.
I wish you all a nice weekend :D!
Ilona

a.jpg)
%2Bblog.jpg)
a.jpg)
a.jpg)
a.jpg)
a.jpg)
a.jpg)
a.jpg)
a.jpg)
a.jpg)
a.jpg)
a.jpg)
a.jpg)
a.jpg)
a.jpg)
a.jpg)
a.jpg)
a.jpg)
a.jpg)
a.jpg)
a.jpg)
a.jpg)
a.jpg)
a.jpg)
a.jpg)
a.jpg)
a.jpg)
a.jpg)
a.jpg)
a.jpg)
a.jpg)
a.jpg)
a.jpg)
a.jpg)
a.jpg)
b.jpg)
a.jpg)
a.jpg)
a.jpg)
a.jpg)
a.jpg)
a.jpg)
b.jpg)
a.jpg)
a.jpg)